


How to Install a 4x4 Lace Closure Wig at Home
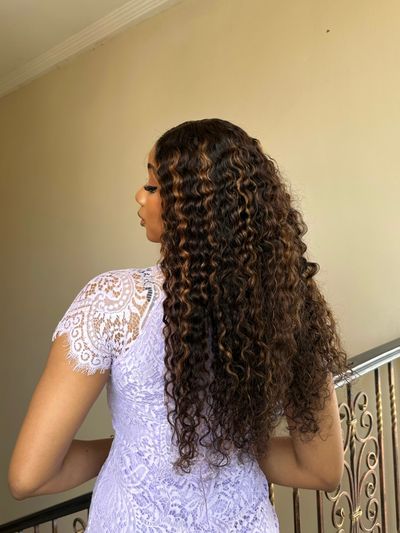
A 4 by 4 lace closure wig offers a natural look with minimal effort. Knowing how to install it at home saves time and money. Installing a closure wig yourself gives you control over the process. You can achieve a seamless and realistic appearance. The 4 by 4 lace closure wig from Luvmeforyou provides versatility and ease of maintenance. Whether you prefer a sleek ponytail or voluminous curls, this 30 inch closure wig lets you experiment with different styles.
Understanding 4x4 Lace Closure Wigs
What is a 4x4 Lace Closure Wig?
A 4 by 4 lace closure wig features a lace part that measures 4 inches wide and 4 inches long. This design allows for free parting, giving you the flexibility to style your hair in multiple directions. The lace area covers the forehead, creating a natural and beautiful hairline. The small size and lightweight nature of the wig make it comfortable for extended use.
Features of a 4x4 Lace Closure
The 4 by 4 lace closure wig offers several key features:
Free Parting: Style your hair in any direction.
Four Combs: Secure the wig firmly on your head.
Natural Hairline: Achieve a seamless look.
Lightweight Design: Wear the wig comfortably for long periods.
Minimal Shedding: Enjoy a secure fit with minimal hair loss.
Benefits of Using a 4x4 Lace Closure Wig
Using a 4 by 4 lace closure wig provides numerous benefits:
Natural Appearance: The lace mimics your scalp, offering a realistic look.
Easy Maintenance: Spend less time on upkeep compared to other wigs.
Versatile Styling: Experiment with different hairstyles, from sleek ponytails to voluminous curls.
Comfortable Fit: The lightweight design ensures comfort throughout the day.
Durability: With proper care, the wig lasts longer, saving you money in the long run.
Choosing the Right 4x4 Lace Closure Wig
Selecting the perfect 4 by 4 lace closure wig involves considering several factors:
Hair Type and Texture
Choose a wig that matches your natural hair type and texture. Options include straight, wavy, and curly hair. Matching the texture ensures a more seamless blend with your natural hair.
Lace Color and Material
Pick a lace color that closely resembles your scalp tone. Common options include beige and dark brown. The material should be breathable to keep your scalp cool and comfortable.
Wig Density and Length
Consider the density and length of the wig. A higher density offers a fuller look, while a lower density provides a more natural appearance. For those who love long hair, a 30 inch closure wig offers ample length for various styles.
Preparing for Installation
Tools and Materials Needed
Wig Cap
A wig cap helps create a smooth base for the wig. Choose a cap that matches your scalp color. This ensures a seamless look.
Adhesive (Glue or Tape)
Adhesive secures the wig in place. Options include glue or tape. Both provide a strong hold. Select one based on personal preference.
Scissors and Tweezers
Scissors trim excess lace. Tweezers help pluck the hairline. Both tools ensure a natural appearance.
Hair Clips and Combs
Hair clips keep sections of the wig out of the way. Combs help style the wig. Both tools make the installation process easier.
Prepping Your Natural Hair
Washing and Conditioning
Clean hair provides a better base for the wig. Use a gentle shampoo and conditioner. Ensure your hair is completely dry before proceeding.
Braiding or Wrapping Hair
Braiding or wrapping your hair creates a flat surface. This step prevents lumps under the wig. Secure the braids or wrap with bobby pins.
Applying the Wig Cap
Place the wig cap over your braided or wrapped hair. Adjust the cap until it covers all your hair. The cap should fit snugly without being too tight.
Expert Tip: "Whether you’re new to wigs or have been wearing them for years, these expert tips and tricks for setting up a perfect install should help make sure everything looks seamless and stays put no matter what life throws at you!"
Step-by-Step Installation Guide
Securing the Wig Cap
Positioning the Cap
Place the wig cap over your head. Make sure the cap covers all your natural hair. Adjust the cap until it sits comfortably on your scalp.
Securing with Adhesive
Apply adhesive around the edges of the wig cap. Use glue or tape based on your preference. Press the cap gently to ensure a secure fit.
Preparing the Lace Closure
Trimming the Lace
Use scissors to trim the excess lace from the closure wig. Cut close to the hairline for a natural look. Take your time to avoid cutting too much lace.
Bleaching the Knots (Optional)
Mix bleach powder and developer in a bowl. Apply the mixture to the knots on the lace. Leave it on for 15-20 minutes, then rinse thoroughly. This step helps the knots blend with your scalp.
Plucking the Hairline (Optional)
Use tweezers to pluck hairs along the hairline. Create a more natural and less dense look. Be careful not to overpluck.
Applying the Wig
Positioning the Wig
Place the closure wig on your head. Align the lace with your natural hairline. Adjust the wig until it fits comfortably.
Securing the Lace Closure
Apply adhesive to the edges of the lace. Press the lace onto your scalp. Hold for a few seconds to ensure a strong bond.
Blending with Natural Hairline
Use a comb to blend the wig with your natural hairline. Apply foundation or concealer to the lace for a seamless look. Style the wig as desired.
Expert Tip: "Take your time during each step to ensure a flawless installation. Practice makes perfect!"
Styling and Maintenance Tips
Styling the Wig
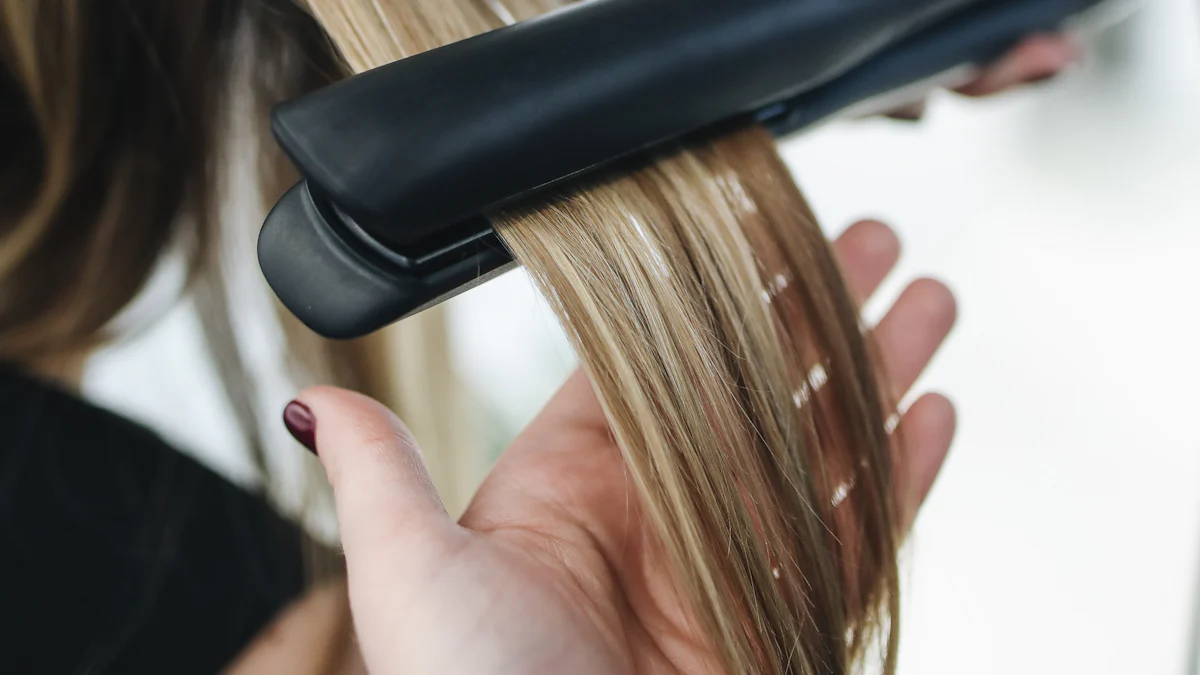
Heat Styling (Curling, Straightening)
You can use heat tools to style your 4x4 lace closure wig. Curling irons and straighteners work well. Always set the tools to a low temperature. High heat can damage the wig fibers. Ceramic tools are better than metal ones. They distribute heat more evenly. Wet the hair slightly before styling. Use lightweight mousses to help hold the style. Avoid overdoing it with heat. Too much can cause permanent damage.
Using Hair Products
Hair products can enhance the look of your wig. Lightweight products work best. Heavy products can weigh down the wig. Use a small amount of leave-in conditioner. This keeps the hair soft and manageable. Avoid products with alcohol. Alcohol can dry out the wig fibers. Use a wide-tooth comb to distribute the product evenly. This prevents tangling and breakage.
Maintaining the Wig
Cleaning and Washing
Regular cleaning keeps your wig looking fresh. Wash the wig every two weeks. Use a gentle shampoo and conditioner. Fill a basin with cool water. Add a small amount of shampoo. Submerge the wig and swish it around. Rinse thoroughly with cool water. Apply conditioner and let it sit for a few minutes. Rinse again and gently squeeze out excess water. Pat the wig dry with a towel. Avoid wringing or twisting the hair. Let the wig air dry on a wig stand.
Storing the Wig
Proper storage extends the life of your wig. Use a wig stand or mannequin head. This helps maintain the shape. Keep the wig in a cool, dry place. Avoid direct sunlight. Sunlight can fade the color. Store the wig in a breathable bag. Plastic bags can cause moisture buildup. Moisture can lead to mold and mildew. Brush the wig gently before storing. This prevents tangles and keeps the hair smooth.
Expert Tip: "Treat your wig like your natural hair. Regular care and proper storage will keep it looking fabulous for a long time!"
Recapping the installation process, you now know how to install a 4x4 lace closure wig at home. From prepping your natural hair to securing the wig cap and applying the lace closure, each step ensures a seamless and natural look. Trying this at home gives you control over your hairstyle and saves money.
Ready to elevate your style? Explore Luvmeforyou's range of 4x4 lace closure wigs. Discover high-quality products that blend effortlessly with your natural hair. Visit Luvmeforyou today and find the perfect match for your unique style.


