


How to Install a T Part Closure Wig Step-by-Step

A T Part Closure Wig offers a stylish and natural-looking solution for those seeking to enhance their appearance. With its unique 'T' shape design, this wig provides versatile styling options and a comfortable fit. Proper installation ensures a seamless blend with your natural hairline, giving you a flawless look. The Closure wig from Luvmeforyou stands out for its ease of use, making it ideal for beginners. Whether you want to switch up your style or need a quick hair fix, learning how to make a wig with closure can transform your beauty routine.
Preparing for Installation
Gather Your Tools
To install a T Part Closure Wig from Luvmeforyou, gather the necessary tools. Essential items include a wig cap, comb, scissors, and adhesive products like Got2B Glued Blasting Freeze Spray. A rattail comb helps with precision, while a WigGrip ensures the wig stays in place without extra clips or excessive glue. Other useful tools include a mannequin head, styling products (mousse, gel, hairspray), and heat styling tools.
Prepare Your Natural Hair
Properly preparing your natural hair is crucial for a seamless installation. Start by braiding or flattening your hair to create a smooth base. This step ensures the wig sits flat against your scalp. Next, apply a wig cap to secure your hair. The wig cap serves as a foundation, providing stability and helping to blend the wig with your natural hairline.
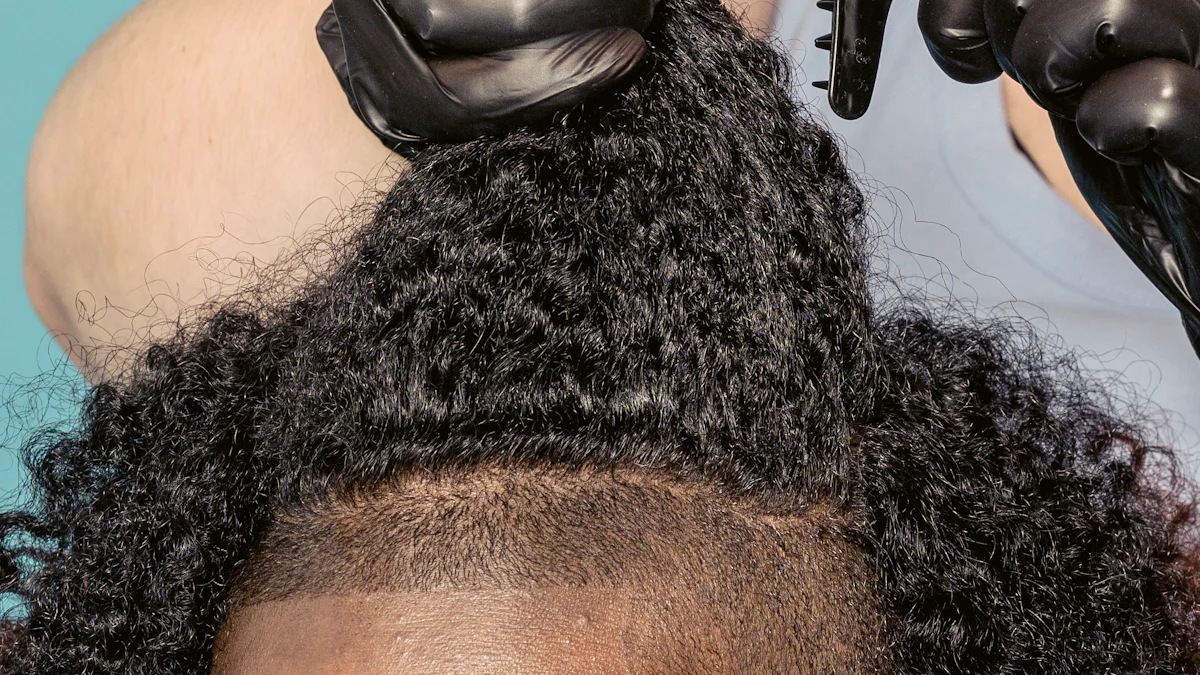
Preparing the T Part Closure Wig
Before installing the Closure wig, adjust it to fit your head. Place the wig on a mannequin head for stability. Use a comb to detangle the hair and ensure it looks natural. Adjust the straps inside the wig to achieve a snug fit.
Next, cut the lace carefully. Use scissors to trim the lace along the hairline, leaving a small margin for blending. The HD transparent lace closure enhances the wig's appearance by mimicking a natural scalp and blending seamlessly with your skin color.
Installing the T Part Closure Wig

Positioning the T Part Closure Wig
Align the T Part Closure Wig with your natural hairline. Start by placing the wig on your head. Ensure the middle part of the wig sits directly over your natural part. Use a mirror to check the alignment from different angles. Adjust the wig until it looks symmetrical and natural.
Securing the T Part Closure Wig
Secure the wig using adhesive or wig clips. Apply a thin layer of adhesive along your hairline. Press the lace into the adhesive for a secure hold. If you prefer not to use glue, opt for wig clips. Attach the clips to the edges of the wig and fasten them to your natural hair. Ensure the wig feels snug but comfortable.
Blending the T Part Closure Wig
Blend the lace with your skin tone for a seamless look. Use a foundation or powder that matches your skin color. Dab the product onto the lace, focusing on the hairline. This step helps the lace disappear against your scalp. Style the wig to enhance its natural appearance. Use a comb to create baby hairs around the edges. Apply styling products to tame flyaways and add shine. Heat styling tools can help achieve your desired look.
Post-Installation Care
Maintaining the T Part Closure Wig
Daily care tips
Maintain the T Part Closure Wig from Luvmeforyou with daily care. Gently brush the wig using a wide-tooth comb to prevent tangles. Avoid excessive pulling to keep the hair strands intact. Store the wig on a mannequin head or a wig stand to maintain its shape. Use a silk or satin scarf to cover the wig when not in use. This prevents friction and reduces frizz.
Washing and conditioning the wig
Wash and condition the wig regularly to keep it looking fresh. Fill a basin with lukewarm water and add a small amount of sulfate-free shampoo. Submerge the wig and gently swish it around. Rinse thoroughly with cool water. Apply a moisturizing conditioner and let it sit for a few minutes. Rinse again with cool water. Pat the wig dry with a towel and let it air dry on a wig stand. Avoid using heat tools frequently to prolong the wig's lifespan.
Troubleshooting Common Issues
Fixing lifting lace
Fix lifting lace by reapplying adhesive. Clean the area around the hairline with a cotton pad and alcohol. Apply a thin layer of adhesive to the lifting lace. Press the lace back into place and hold for a few seconds. Use a blow dryer on a cool setting to speed up the drying process. For a more secure hold, use a wig band to keep the lace in place.
Adjusting the fit
Adjust the fit of the Closure wig for maximum comfort. Check the adjustable straps inside the wig. Tighten or loosen them to achieve a snug fit. If the wig feels too tight, consider using a wig extender. This accessory provides extra length to the straps. Ensure the wig sits flat against your scalp to avoid any discomfort.
Recap the key steps for installing a T Part Closure Wig. Gather your tools, prepare your natural hair, and adjust the wig. Position the T Part Closure Wig, secure it with adhesive or clips, and blend the lace with your skin tone. Maintain the wig with daily care and regular washing. Fix common issues like lifting lace and adjust the fit for comfort. Proper care and maintenance ensure a long-lasting, natural look. Try the process yourself for a flawless appearance.


